The beauty of trials riding is that pretty much any place, whether in an urban or a natural setting, can become a playground where to spend countless hours experimenting on your bike. Which means you never have to go very far beyond your doorstep. As your skills develop, you can be more creative and try new riding lines that were too difficult to consider when you just started. You will just be looking at things in a different way.
Urban versus Natural
If you live in a big town, you will more likely be riding over man-made obstacles and concrete structures such as walls,
steps, kerbs, railings, stacks of pallets, with plenty of flat surfaces, straight lines, and square edges to get your grip on.
Urban trials is great to get your marks on specific techniques.
The shapes and adherence of such obstacles are quite predictable,
which is good for absolute control and certainly easier to begin with, but then for the same reasons, urban riding tends to be a bit
repetitive. As long as you don't put other people at risk or commit any offences, you'll often find some public to encourage you or
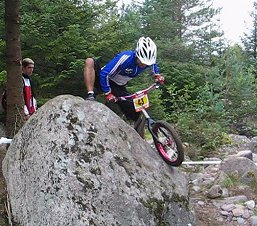
express their astonishment. Beware, you would be missing out on the full dimension of bike trials if you were to ignore natural
settings altogether.
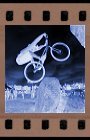
Natural is unique
Learning all the cool tricks and techniques in a polished urban set is one thing.
Much more challenging is to go out and use your riding skills in a natural zone. Not least because the terrain is never straight
or flat which makes maintaining balance more difficult and limits run-up distance too.
That's why nailing a pure technique on a square
bit of dry concrete is no guarantee of success on uneven boulders or wood logs, especially with hugely variable levels of grip (wood bark
coming off, lose gravels, mud, wet roots, slanted rocks, just name it...).
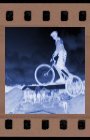
Slippery stuff...
At the beginning you may think, Natural? What's the point of riding in this mess?
Riding trials in a natural zone involves much more than the mechanical and repetitive use of known techniques.
It pushes your riding to a new level of accuracy, for distance evaluation, pedal power, weight transfer, wheel
positioning and braking control.
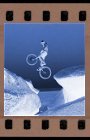
Here comes the mental game, the concentration and the strategic thinking. With many paths to choose from,
numerous angles from which to look at the obstacles combined with adverse terrain, natural trials reserves you the most exciting
and rewarding side of the sport. You may find it too difficult at the beginning, but if you have the chance to live nearby some
interesting natural landscapes you should definitely make the most of it. It may become your favourite place to ride.
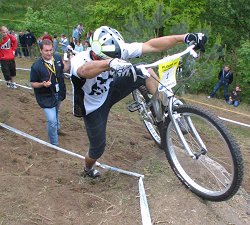
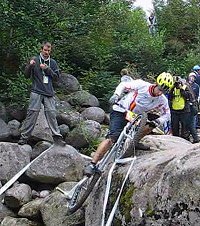
Competition grounds
At competitions, you will find supervised zones. These are sections marked by arrows and tape or ribbons, spreading over a series of
obstacles or difficult terrain. Riders must follow the markers, ideally without ever setting a foot on the ground while an observer keeps
a tab on penalty points.
Most bike trials competitions take place in natural settings, often completed with man-made sections.
An artificial (man-made) section is called "indoor" even when it is set up outdoor, because it could be built under a roof
(as it is the case for competitions held in stadiums or exhibition halls). Indoor sections usually feature a good mix of heavy
construction materials such as concrete blocks or pipes, with wood logs, industrial pallets, heavy truck tyres, skips, car wrecks,
or just anything solid and varied.
Most biketrial competitions take place in natural settings, with only a minority of man-made zones
(called indoor even-though they are often held outdoor).
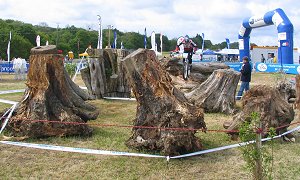

A wood log section, and an indoor section based on concrete pipes.
For example, you could have between 6 and 10 sections, marked with ribbons and arrows of different colours
corresponding to the different rider categories (for mod or stock bikes, different age groups, and levels of skills).
In a competition, each section should be cleared in less than 2:30mn (with extra time counted as penalty points), and you if you bail out,
then you are out of the section, until the second or third run if you have to make several passages (riding all the sections in order).
On each run, your penalty points are logged on a punch card you carry with you. The rules and penalties
are different depending on if the competition follows the Union Cycliste Internationale (UCI) or Biketrial International Union (BIU) rules.
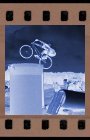
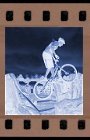
Check out all the techniques as used in competition, either in natural or indoor sections.
(click on the videos)
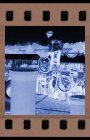
Walking through the zone
Getting a feel for the gaps
Strategic thinking
Now, before the run, you are given some time to look around and walk through the sections to discover them and think in advance
your strategy. That's an important part of the mental preparation. If you evaluate the terrain and identify the best possible lines,
you are less likely to hesitate and be short of time during the actual run.
If you are not the first to enter the section, it's also a good thing to watch other riders ride the zone.
They can come up with different approaches that you hadn't thought off.
Make the most of your dab
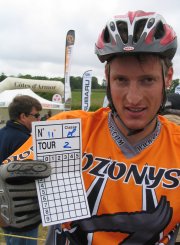
A typical punch card.
Use your penalty points (up to five)
If the only way to climb an awkward obstacle is to
put a foot down (1 penalty point), that's better than failing completely (5 points for bailing out).
But if you plan to use a penalty point (or even if it wasn't planned), try to make the most of it, and place your foot
as high or as far as you can in the direction you want to go.
That'll save you other stupid points. Then, once your foot is well placed,
move up onto it, pushing or placing your bike as far as your leg will stretch. When you are ready, give a good impulse to
come back onto the bike. Avoid stepping with your foot down (this counts as one penalty per step). Also, at all times, you must have one leg on each side
of your bike. Never put your feet on the same side of the top tube, it is counted as a 5 points penalty like if you were bailing out.

Setting up a zone
If you fall short of interesting places to ride nearby, setting up a modest indoor zone doesn't require much space in a
backyard or even in a warehouse. A dozen industrial pallets combined with some imagination will give you plenty of obstacles
to try from, easily reconfigured to practise your current skills. With more material and space, the sky is the limit.
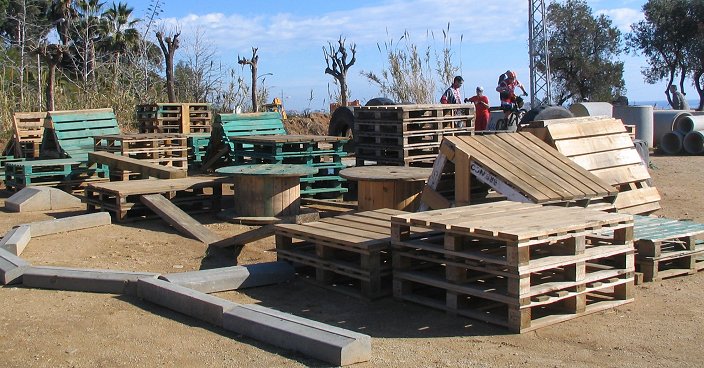
A pallets section, for all levels of skills.
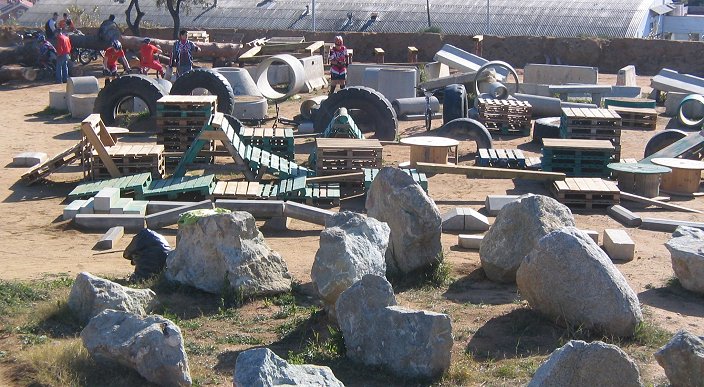
Some other settings (from Cesar's trials school)

Looking for any trials specific components?
Check out the Manufacturers' listing on the Bikes page.
You'll find all the major MTB and biketrial names and online shops:
(Ashton, Czar, Echo, Gu, Inpulse, Koxx, Monty, Onza,
Ozonys, Rockman, Try-All, TMS, Viz, Zoo, etc...)
Sign the guestbook or email your comments
Copyright © 1998-2013: TrashZen


